|
Download Members: $0.00 Non‑Members: $75.00 |
Buy Now |
Publication Details
| Published Date: | |
|---|---|
| Authors: | Paul Nichola |
| Citation: | Paul Nicholas |
Abstract
Challenge
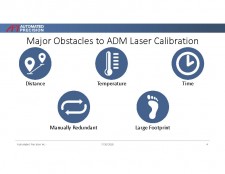
Existing processes for calibrating ADM laser trackers involves time consuming practices, manual redundancies and large footprints that inhibit an efficient process for sending laser trackers back into the field where they can be utilized by the end user.
This calibration procedure designed by Automated Precision is used to map and eliminate the intensity dependent error (IDE) and the absolute distance error (ADE) within the laser tracker.
• The calibration team initially performs IDE at set distances up to the full range of the tracker to map the intensity return of the ADM laser on the SMR.
• The calibration team then places the compensation file that the software calculates into the tracker controller and perform ADE. ADE maps and compensates for the ADM to IFM distance error.
Process
Automated Precision utilizes the following process to accomplish the calibration routine:
• Uses a roughly 25-meter rail with the IFM from an API XD1 Laser Measurement System to calibrate the ADM laser on the API OT2 (ADM only laser tracker)
• The Calibration Engineer will set-up the OT2 on the mount and rough align the OT2 beam to the reflector on the rail
o The XD1 shoots into the same reflector
• The XD1 takes measurements at the same time as the OT2, these measurements are graphed/compared using the software and then a compensation file is generated
• The compensation file is then loaded into the OT2 controller and a verification is performed.
• If any measurements are out of specification, you will need to perform the calibration process again.
o This process is fully automated
Benefits
This calibration routine is a state of the art process for ADM laser trackers. It continues to provide efficiencies in business processes and allows for decreased turn around time in sending laser trackers back in the field to the end user. Provided below are benefits to industry:
• GO / NO go data display
• Software generated error reports
• Simple user interface and minimal user experience required
• Consistent and stable data collection platform
• Integrated compensation validation through report of data
• Reduces labor hours due to be a fully automated process
• Allows for a Wider range of lab environment temperature deviation of +/- 2 degrees Celsius
Impact to Industry
The rail system calibration process adheres to industry standards while providing quality improvements through an automated process.
• Abbe Principal adherence
• ISO 17025 compliant for Lab Accreditation
• NIST traceable through transfer XD Laser
• Utilizing less footprint:
o Requires 25 – 27 meters in linear distance to calibrate 50- meter due to 2:1 ratio
• As found data capable
• Increased quality due to reduction of human error
• Designed for lab with automation focus.

