|
Download Members: $0.00 Non‑Members: $75.00 |
Buy Now |
Publication Details
| Published Date: | |
|---|---|
| Authors: | Kerstin Zangl, Reinhard Danzl, Michael Kreil, Franz Helmli |
| Download Format: |
Abstract
In recent years, the manufacturing industry has experienced a shift towards automated, high-precision processes. As a result, the demands on measuring instruments in terms of accuracy, speed and automation have increased.
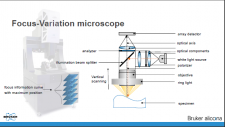
In general, tactile coordinate measuring instruments and their modes of operation are well known in industry. Points or profiles are measured on the surface by moving a stylus probe tip over the surface. An advantage of tactile CMMs is that geometric verification can be done in a very fast and easy way by measuring a set of points, computing an association between measured data and nominal data and calculating geometric dimensions and tolerances. E.g., for a radius of a cylinder at least 3 points are measured, a circle is associated, and the radius can be calculated and verified with respect to the nominal geometry. Vertical surfaces on workpieces are typically measured by lateral probing. In contrast to tactile CMMs, optical CMMs based on e.g., focus variation or white light interferometry are characterized by their high resolution, area-based measurements where a huge number of points is measured at the same time. In general, optical measurement machines are limited in terms of lateral probing as the maximum measurable slope usually depends on the numerical aperture of the objective. To overcome this limitation, many optical measurement machines use a 5-axis configuration to manipulate the workpiece for measuring vertical surfaces. Further developments of optical measuring principles like Vertical Focus Probing (VFP) allow direct optical lateral probing. VFP is an optical area-based measurement principle developed for the measurement of vertical walls with slope angles ≥90°. It uses vertical scanning to measure a whole area along the vertical surface. Here, a new measurement principle, so-called ‘Focus Probing’ (FP), is presented which probes profiles in an optical and fast way. FP is an optical measurement principle which measures not areas, but 3D contours on vertical surfaces by optical lateral probing in a few seconds. The measurement principle exploits the fact that dependent on the surface characteristics and the geometric behavior of the workpiece and the used lightsource always some part of light is reflected to the optics. In addition to the measurement itself, algorithms implemented in the software enable automatic recognition of geometric elements e.g., cylindrical parts or parallel lines, so that the association is performed automatically. Due to the profile-based measurement and the automatic detection and association, dimensional measurements and geometrical verification can be done quickly and in a similar mode of operation as tactile CMMs but with the advantage that it works contactless. For example, to measure the radius of a cylindrical component, 3D contours are measured, and a circle is automatically associated and verified with respect to the nominal geometry.
The measurement principle of FP is presented in detail and a differentiation with respect to VFP is given. It is demonstrated that the gap between tactile and optical CMMs can be further decreased. Requirements, possibilities, and limitation of FP will be discussed and an overview of potential applications in coordinate metrology in industry is given.
