|
Download Members: $0.00 Non‑Members: $75.00 |
Buy Now |
Publication Details
| Published Date: | |
|---|---|
| Authors: | Don Burnard |
| Download Format: |
Abstract
Large-volume, close-tolerance measurement presents unique challenges for aerospace manufacturers. Traditionally, metrology on large assemblies such as fuselages or wings has been performed using jigs, and the parts need to be moved to locations in the facility in which the measurements can be taken. However, this practice risks breakage to the parts and exposes them to security concerns during transport, which often necessitates them moving between hangars and other buildings.
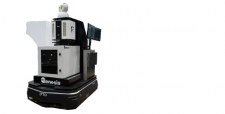
In this paper, we will present an alternative option—a mobile metrology platform (MMP) utilizing Nikon Metrology’s laser radar (LR) technology, which uses an infrared laser to create highly accurate point clouds. The point cloud can be compared directly to CAD or features extracted and compared to nominal. For the application we will be discussing, the LR system is mounted to a self-driving vehicle (SDV), which is a portable robot. This allows the measurement system to be brought to the part, as opposed to the part needing to be brought to the measurement system.
A large aerospace manufacturer employed this solution to overcome several limitations of their previous metrology workflow. This paper examines these issues and describes the ways in which the MMP solved them. Results of a series of performance tests conducted by the Nikon Metrology team are then revealed, demonstrating that the MMP offers acceptable levels of variation in various measures. Finally, the lessons learned are explored and the potential uses for this application in additional industries are enumerated.
Big parts can mean big problems for manufacturers; an LR system mounted on an SDV is an elegant solution to save time and money. This project demonstrated that metrology systems can utilize robotics in innovative ways to achieve breakthrough results for manufacturers.

